


The initial plan seemed straightforward. Cloudflare has its own tool, called "wrangler," which is designed to simplify the deployment process with Cloudflare's systems. However, as I delved deeper into the documentation, I quickly realized that the reality was far from simple.
One of the first hurdles I encountered was the inability to download templates for Rust projects. Instead of the convenient command Cloudflare provided, I had to manually copy and paste the repository containing the Rust template I wanted, and then meticulously adjust the variables in the wrangler.toml file to fit my project's needs.
That is because the command mentioned in their documentation:
was generating errors for me.
Determined to overcome the obstacles of Cloudflare, I forged ahead, drawing on my previous experience with Rust and API development. But as I soon discovered, Cloudflare's ecosystem had its own unique quirks and requirements. The Cloudflare-specific library I had to use for deployment, coupled with the fact that Cloudflare compiles Rust code to WebAssembly (Wasm), added an extra layer of complexity to the process.
I had built many APIs with Tokio and Axium before, but that knowledge had gone to waste with the Cloudflare API framework. Developers, beware! Converting your code for Cloudflare is not something that can be done in a few hours.
Undeterred, I pressed on, determined to find a solution. After days of trial and error, I finally managed to link my GitHub repository to Cloudflare and create the backend (the equivalent of "Cloudflare Workers") project.
But just when I thought I was nearing the finish line, I encountered a new obstacle: the dreaded "cargo: not found" error.
This error message indicated that the cargo tool, which is essential for building Rust projects, was not installed on the machine attempting to build my code.
First, I tried re-executing the deployment process. Who knows... maybe I had just been unlucky, and that this was the only machine that didn't have cargo installed. Wrong! My second execution did not pass.
How could I possibly resolve this? Building the code is quite instrumental, and there's no way around it. That's when I revisited the reason I was receiving this error.
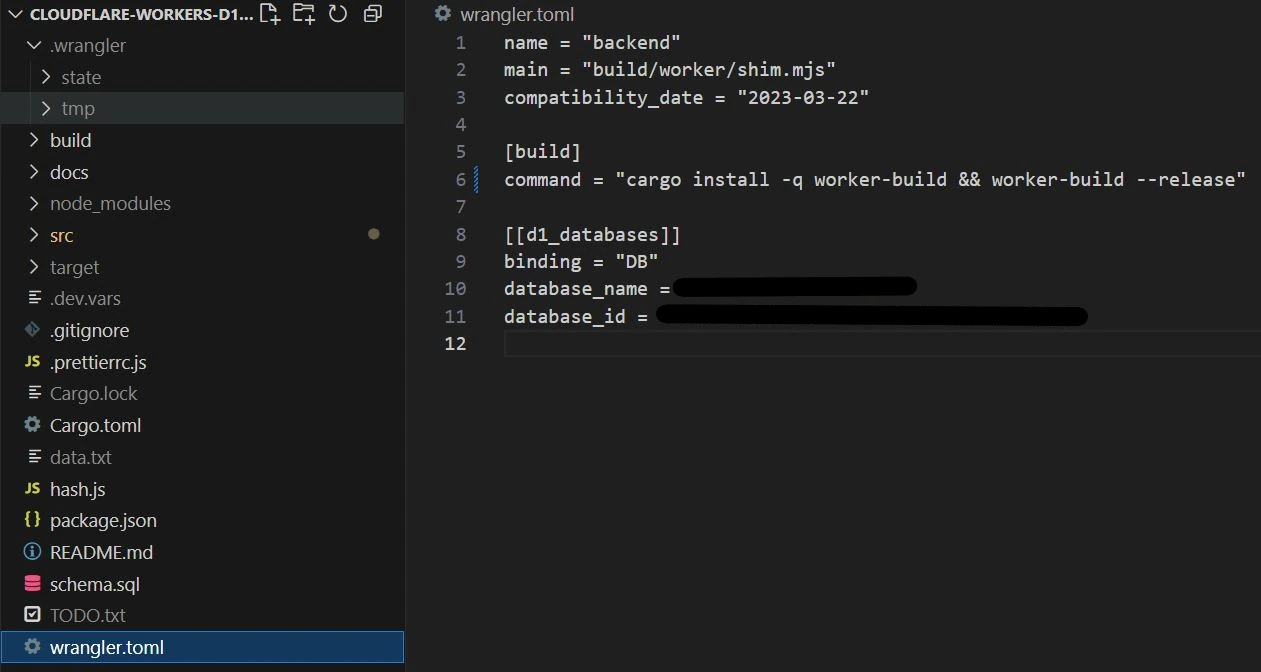
Where can I find this piece of code? The command is currently defined in the wrangler.toml file, under the build section. Then, I can change that command, because the file is found in my Github repository.
I decided to remove the command altogether, making the field empty. OK. The deployment process seems to pass, but nothing happens (as expected). How could I make this work?
The command that I had just removed added the executables under the build folder. What if I added the build folder to my Github repository? It's not a good practice, but if it works, I could create an automated process to build my code before pushing it to the repository.
I got back to my IDE. I could clearly see the build folder locally, but I couldn't see it in my repository. What was I missing?
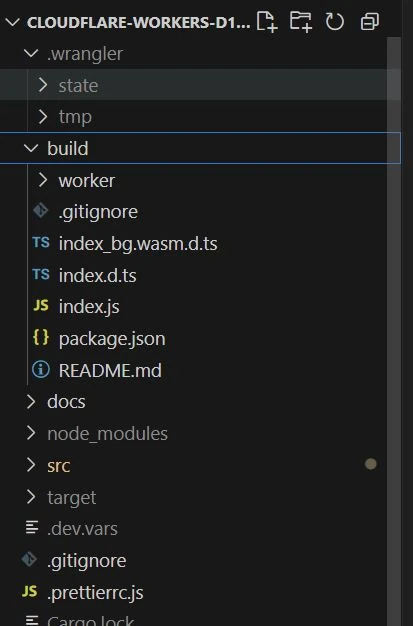
It was a eureka moment when I realized that there was a hidden .gitignore file under the build folder that was excluding the build folder, preventing the executables from being included in the repository.
After removing this exclusion, I was able to successfully push the compiled binaries to GitHub, and Cloudflare was able to deploy my project without any issues.
Through this challenging journey, I learned valuable lessons about the importance of thoroughly understanding the deployment platform's requirements and the need to be adaptable and persistent when faced with unexpected obstacles.
I created a Cloudflare ticket and resolved it here:
Workers do not come with cargoIf you're considering deploying your Rust-based project on Cloudflare, I encourage you to heed my experience and be prepared for a potentially arduous, yet rewarding, process. By anticipating the unique challenges and leveraging the tricks I've shared, you can increase your chances of a successful deployment and unlock the benefits of Cloudflare's powerful platform.